Showing posts with label hand-dyed fabrics. Show all posts

Thursday, August 5, 2010

Return of the Fringe

Last year I began creating stitching samples for a client, and without meaning for it to happen, they turned into their own on-going series I've always called "Fringe".


Some of these little pieces became my "favorite one ever!" for a while, and I've allowed the series to carry me along to wherever it has wanted to go.


It's motored right into this year, and resulted in another piece created for a quilting challenge over at 3 Creative Studios.


This week, I finished a couple more of these fun little critters. One got a permanent home on this stretched artists' canvas.


The canvas, one I've been tinkering with for several years, is 12" x 12" and contains countless layers of paint, cheesecloth, paper and even a few stitched remnants of other quilts (click the photo for a hi-res view). The canvas is embellished with paper buttons and paper beads.


The quilt started life as white cotton. It was layered with batting and a muslin backing and then tight pleats were sewn across the front of the sandwich with more lengths of cotton. The pleats are snipped open and the whole thing was then hand-dyed, over-dyed, and finally laundered many times to develop the shaggy fringe that is the cornerstone design element of this series. The quilt, which itself only measures about 6" x 7", was stitched to the canvas with transparent thread.

A second Fringe piece out of the dye baths this week is this little thing.


It was constructed in the same manner as the others but has only been through its first dye bath. I love the way the fringe has tangled all of the colors together and now lays across the piece, but the palette is not as sophisticated as I'd like it to be, so it will likely undergo another dyeing or painting session. Then I will listen as it tells me whether it wants to be beaded and mounted, like the others, or if it has other ideas for its future.

In other areas of the studio this week, I dyed, and then overdyed and then overdyed again this simple cotton sarong for a vacation we're taking to the Bahamas next month.


I was going for tropical colors and mostly achieved that, but it's just a little wrap to tie around my waist as I go from my room to the pool and back, so I'm not going to fuss with it any more.

This week also saw me practicing again with my new Thermofax screens on old painted papers.


It's so much fun that I find it difficult to put the painting supplies away when it's time to move on to something else!
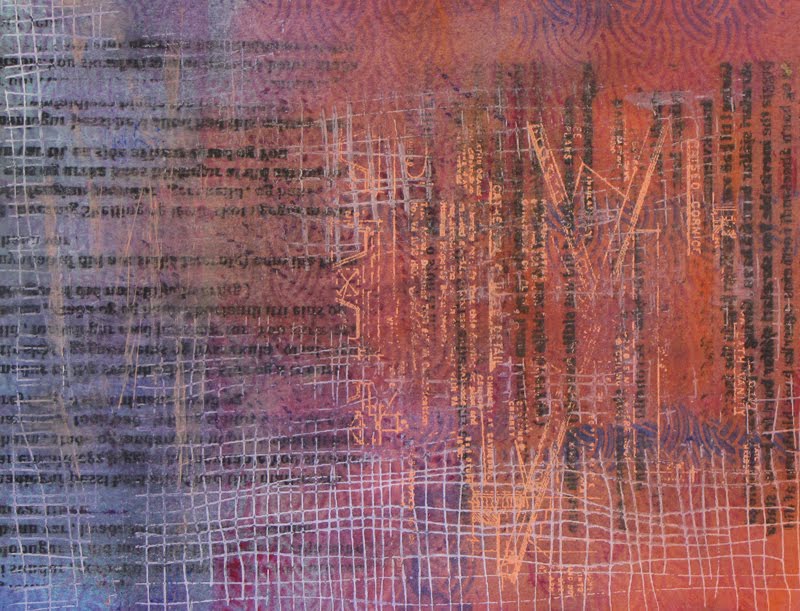

Finally, this cotton art cloth piece is now hanging on the design wall while I decide what more it needs.


It measures 45" x 45" and started as off-white cotton Primatex. It was treated with some breakdown printing and then screen printing.


I have four screens charged with dyes waiting for a DSP session next week. Until then, hope your weekend is as chilled as mine will be!


Happy creating!

Wednesday, June 9, 2010

Give-Away Winner Announced!

Wow, what a response, thank you all! I have taken all the comments, numbered them according to the timestamp on the emails and run them through the random number generator at Psychie Science.

The winner of a piece of my own hand-dyed fabrics is Andrea! Andrea, I will be sending you an email shortly to gather up your contact info. The fabric will be shipped out to you on Saturday. Congratulations to Andrea, and thank you to EVERYONE who participated!

(Last Minute Edit: Andrea, your profile access is turned off. Without being able to access your dashboard, I can't email you. Please contact me directly, if you please. Thanks!)

In other news, these three art fabric pieces...


... will be hanging in the FABRIC 2010 : Handmade Designs on Fabric for Quiltmaking contest, hosted by the Quilt Surface Design Symposium, until Friday. Fingers crossed that I place... the two top prizes are workshops at next year's symposium!

And finally, something unexpected and totally wonderful was given to me to give to all of you. After writing about not having a professional .pdf creator, I received emails from many of you offering to make the pdf for me yourselves. This community is so kind and warm and I thank all of you for that!

One lady, however, just as a Very Nice Thing To Do, spent three days re-formatting and tweaking my Stamp Making For Textile Artists and turned it into a gorgeous 11-page clickable .pdf file. I wanted very much to use her name here to thank her, and to have it placed on the .pdf file itself, but I haven't received permission from her to do so yet and I want to respect her privacy. You know who you are, though, so thank you, thank you, thank you.

So here it is for anyone who wanted one, Stamp Making For Textile Artists. Enjoy!

Wednesday, May 5, 2010

Dyebaths and Resists and Thread Schmutz, Oh My!

Are you sick of flour paste resists, yet? No, me either.

This piece, which never really did a whole lot for me...


... got a bath this week to tone down its high contrast, a bit.


Now that I'm liking it better...


...it got covered with flour paste today.


This is the largest FPR I've done so far, cotton sateen measuring 90" by 45" (selvage to selvage), and it's taking up my entire work table in the wet studio. However, the weather here right now is unseasonably dry and I expect it to be cured by tomorrow morning and ready for its next layer.

Monday's FPR was dry by yesterday morning, so it got its next layer, too- medium green textile paint.


Because this was treated with textile paint, it will need to cure for about a week before it's safe to wash out the flour. It looks promising, though a bit busy. It might need a final, unifying overdye of a solid color.

Also out the dye baths this week were some mostly unremarkable scraps as well as some lovely, nubbly cheesecloth.


On March 6th of this year, I started stuffing excess thread schmutz into one of my hanging squirrel feeders.


It looked so pretty and was such a great solution for offering nesting fiber to the birds while keeping it mostly contained. Over time, it has begun to resemble a "disintegration bundle", which I've found fascinating. (A disintegration bundle is a package of paper, fabric, metal and fibers that some artists hang from fences and trees in order to study the effect the elements have on the materials.)


I can tell that the birds are using these fibers because I find them tugged out and hanging loose, and they are also strewn around the yard, like bright little baubles in the grass. My hope is to one day spot some of this material in a birds' nest so I can photograph it.

And finally, one from the feeders.


Happy creating!

Monday, May 3, 2010

Off And Running!


My three entries for FABRIC 2010 : Handmade Designs on Fabric for Quiltmaking are in the mail and on their way to Columbus. OH., and after a quiet but wonderful weekend at home with hubby, I was back in the studio this morning, chewing up the scenery.

First thing this morning, this large length of cotton sateen from my last batch of hand-dyeds...


... Got the flour paste resist treatment...


... And now waits to dry. It's destined for a textile paint crackle in a mid-ranged green. As is common when exploring a specific technique, I made a small but important refinement to my process this time with the use of a seventy-five cent plastic tool from the hardware store.


The lowly spackle blade shaved time off my flour paste resist application and gave me a lovely, thin coating which not only saved me on flour (because I didn't need as much to get full coverage), but should promote fine crazing that will look wonderful on the finished fabric. I won't know until much later if this is the last layer this fabric will receive or not.

Once the FPR was set aside to dry, I spent some time monoprinting with thickened black dye (sorry, no progress photos for those- I forgot to take them and now the pieces are wrapped in plastic and batching). I used a product called SuperClear, which is essentially pre-thickened print paste (water and sodium alginate mixed together), and wasn't entirely thrilled with it for monoprinting. It was too thin to really get interesting impressions but I think it will make an adequate-if not spendy- paste for deconstructed screen printing. I'll use the rest of what I have and then go back to making my own. 

Finally, to finish the day, I did some more monoprinting with Neopaque onto some hand-dyed pieces. These pieces are still in their "ugly stage" and will get more layers over time until they're finished. 


Nothing earth-shattering, but a solid start to developing themes for my Blurred Boundaries entry in July.

At the end of the day, despite the mess to be cleaned, a cluttered desk = a productive day and a good start to the week. 


The rest of the week promises to be as busy. Hope your week is everything you want it to be, too... happy creating!

Friday, March 5, 2010

By Your Bootstraps- Part 2

On Tuesday, once the pieces I'd jar-dyed and blogged about yesterday had batched and were fully washed, dried and ironed, my next task was more difficult- creating interesting surface design on these already complex fabrics without destroying or obliterating what's intrinsically beautiful about them. 

For the rest of this week, I've been using the smaller of these pieces to try and develop a theme that I can carry forward and use on the three largest pieces. If any of those pieces are successful, I'd like to enter them into this contest: Fabric 2010: Handmade Designs In Fabric For Quiltmaking. The rules of the contest are simple: the hand must remain appropriate to the fabric, the pigments must be colorfast, and the fabric washable and sellable. 

I started with the least interesting fabrics and broke out all of my stamps, screens and stencils, as well as every textile paint and dye I could lay hands on. 


This piece got some stamping with textile inks, metallic fabric paint and matte fabric paint. 
 

Not bad, but a little too matchy-matchy and pastel for my taste. Plus, once I'd finished stamping, the fabric color became uninteresting to me. To spice it up, I painted it with a couple of different colors of diluted dye-na-flow, scrunched it vertically and left it to dry on a flat, non-porous surface. 


Now we're talking. The pigment, as expected, rose into the peaks and folds of the material to create a bold striped pattern, but it also deepened the overall value of the fabric as well. I heat set the pigments with a dry, hot iron, washed it once more on the soak cycle and ironed it again. I'm happy to report that the hand is still soft and supple and the color is well set. This is a good start towards my goal.

One of the fun things about hand-dyed fabrics is that they don't have a right or wrong side... both sides look equally beautiful. Here's the back side of the piece above.


Next I tried a darker fabric. My first thought was to break out the metallic oil sticks, but I decided that might almost be too obvious. Instead, I reached for the discharge paste and one of my old carved foam printing plates. I stamped the paste on in a few spots, waited for it to dry and then began ironing (which is how the discharge process is activated).**


Almost as soon as I began ironing I removed much more color from one area than I liked. That mistake frustrated me, but then I realized that I was in control of exactly how much dye I allowed the discharge paste to remove. I know that seems like such a no-brainer now, but it had never occurred to me before that I didn't have to just keep ironing until the process stopped. I could iron until I achieved the effect I wanted and then stop and launder the rest of the paste out of the fabric. 

I tried that with this piece, making sure I ran it through the machine twice on the soak cycle, and then to be sure I'd removed all of the excess paste, I ironed the piece once more. Just as I had hoped, no more color was removed. Now I had a subtle effect, but one glaring white-ish spot in the middle of the fabric. 

Out came the dye-na-flow once again, in violet. I wet the white spot, heavily watered down the paint on my brush, and lightly brushed the surface of the fabric, feathering the color outwards. After the fabric had dried again and was ironed for heat-setting, I could no longer even tell where I'd made the discharge mistake.


Next it got a little silk screen treatment with textile inks and it was finished... for now. I think.

26" x 39"

One more of the deeper violet/purple fabrics got the dye-na-flow treatment, but this time before any other media besides the dye had touched it. 


And once that was dried, ironed for color setting and run through the machine a couple of times with Synthrapol, it also was screen printed, only this time instead of straight fabric paints, I mixed the paints with discharge paste.  I knew the paste would remove the dyes but leave the dye-na-flow alone. Further, it would leave behind the fabric paints it was mixed with and give them a bright white background to really help them pop off the background color.


26" x 39"

This is by far my favorite piece and quite possibly the direction I will take the three large pieces that are waiting in the wings.

Next week, I'll use a flour paste resist to add a crackle finish to the boring green fabrics that came out of the top of the dye jar. I'll let you know how it goes.

Towards the end of the weekend or the beginning of next week, I'll be posting a step-by-step explanation of how I do jar dyeing.

In the meantime... oh you know, just be happy!

**(PLEASE NOTE: This is a toxic process... please use a respirator, saftey gloves and glasses and use only in a well-ventilated area. I'm not kidding about this.)

Thursday, March 4, 2010

By Your Bootstraps- Part 1

Yep, I had a few bad weeks and then my computer went wonky for a while, but I'm back online (thanks, honey!) and I've been busy and want to tell you all about it, but it will take a couple of posts.

I was wandering through Target last week when I saw this beauty:


Two and a half gallon capacity, made of heavy glass with a mouth wide enough for me to put both my hands in at once (though why would I want to?), and topped with an airtight lid. Swoon. I admit that I snatched it greedily off the shelf as soon as I laid eyes on it. Best 20.00 I've spent all month!

So this week, naturally, I had to test it out with a new batch of parfait dyeing- nine pieces of cotton muslin. Six of the pieces are 26" x 39" and three of them are 42 & 1/2" x 55". I keep hearing the drum beat that extolls us to, "work larger, work larger..." and I am in agreement- to stretch myself, I must work larger and with a new wet studio, I don't have any more excuses not to.

But there's another reason for returning to what's become, for me, a fairly tried and true technique: there's a juried competition for fabric surface design on the Quilt Surface Design Symposium site that I very much want to enter.

So, you know the routine with parfait dyeing: layer dyes and fabrics in a jar; resist the powerful urge to yank the fabrics out when the liquid in the jar turns black (and it will, trust me); batch over night; wash out and ogle shamelessly at the beauty you made. 

(Of course, there's actually a lot more to it than that and because I always get a lot of questions about this technique when I mention it here, one of my next posts will be how I do jar dyeing, step-by-step. Please forgive me for not posting it here today but it isn't even nine o'clock and my head is drooping towards my chest already.)

The top two fabrics in the jar are often boring- they are only in contact with one or two dye colors and they generally aren't submerged in the dye bath, the way the bottom, and usually more interesting fabrics are. I haven't photographed those. I'm working on ways to repair that little foible, though, so please wish me luck. The rest of the pieces in the jar were more impressive.

 
26" x 39"
 

(detail)

  
42 & 1/2" x 55" (blurry, sorry about that)

 (detail)

  
26" x 39"

  
26" x 39"
 
  
42 & 1/2" x 55" 

  
42 & 1/2" x 55" 

 
(detail)

I found it a little spooky, but also kind of reassuring, that I almost perfectly matched the color combinations I'd achieved on my very first jar dyeing attempt. However, we all have our prefered color palette, I suppose, and this is mine- is it any real surprise that I keep reaching for the same dye colors?

Tomorrow I will finish this post and talk about what I spent the rest of the week doing with these fabrics and then perhaps over the weekend, I'll go into detail about parfait dyeing. In the meantime, happy creating!